Image SEO is the process of improving your site images’ visibility in the Google Image Search.
It’s also about optimizing the images to ensure they load quickly, make your site’s content visually appealing, and help establish your brand.
So here’s the list of topics we’re going to follow in this handbook to help you perfect your image SEO:
- Right Image Format
- Image Compression
- Unique Images
- Descriptive Alt Text
- Descriptive Title, File Name & Captions
- Image Dimensions
- Responsive Images
- Vector Graphics
- Image File Structure
- Image Sitemap
- Relevant Context
- Structured Data
- Image Lazy Loading
- Leverage Browser Caching
- Use a CDN
- Optimize for SafeSearch
Let’s get started…
Right Image Format
While there are many different image formats on the web, the most popular ones are: PNG, JPEG, and WebP.
- PNG — best for images with transparent backgrounds.
- JPEG / JPG — lossy compressed format, usually the smallest in size, and good enough for most images.
- WebP — a newer format that offers much better compression than PNG or JPG.
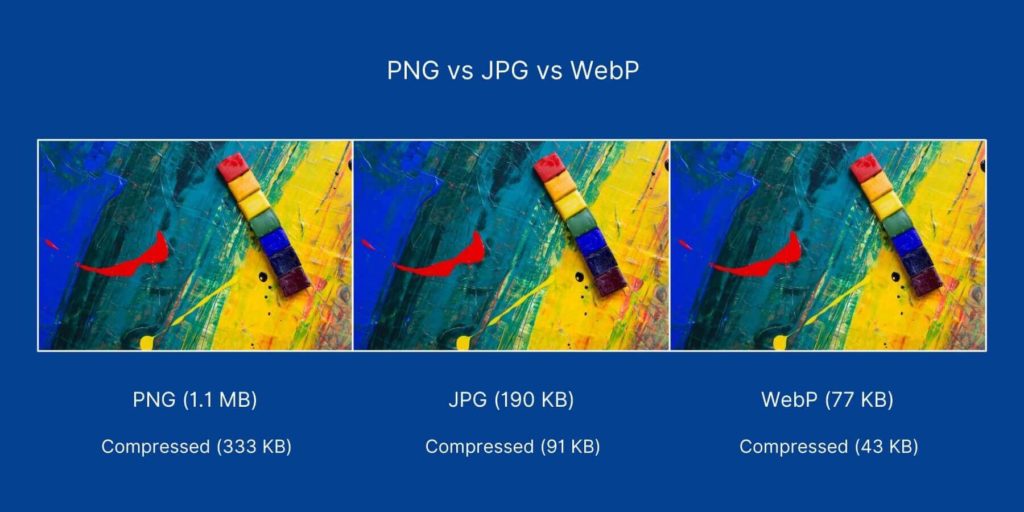
So in terms of image file size, WebP is the clear winner, but it’s still a newer format and not fully supported by web browsers.
The second best format is JPEG. This format is more SEO-friendly, especially if your images do not have transparent backgrounds. But for graphics like logos, charts, drawings, PNG is usually recommended.
Once you have selected the correct image file format, then you have to compress it…
Image Compression
Image compression is a way to reduce image file size without affecting image quality. Compressed images load faster, which positively affects the page load time.
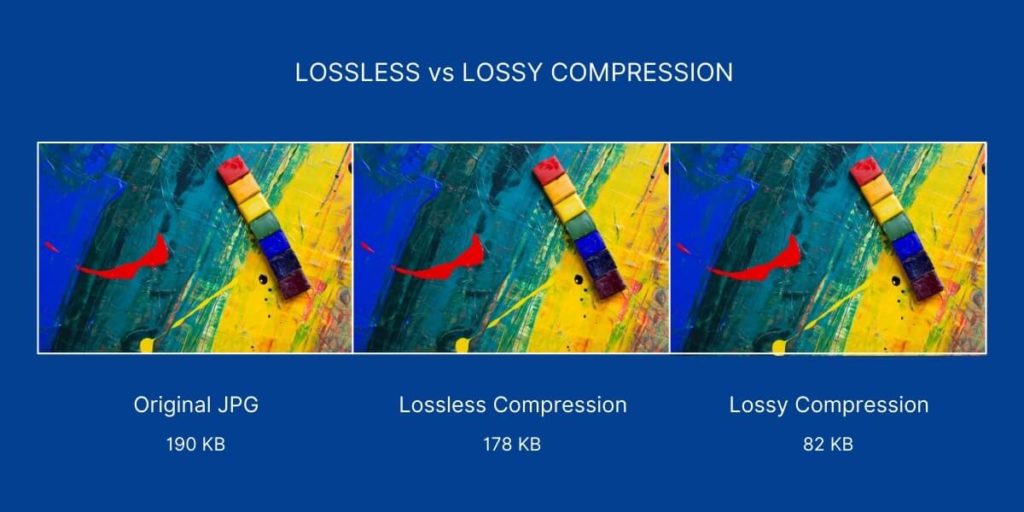
There are two kinds of image compression:
- Lossless — method compresses images while keeping the same quality as it was before compression.
- Lossy — method compresses images by removing some parts of the image.
Here’s an example of lossless vs. lossy image compression.
Ideally, you should keep your images under 100 KB size. But this is no hard and fast rule. You can experiment with lossless and lossy compression and see what gives you the best results.
In this handbook, many images are in the 100 – 200 KB size range as image quality is a priority for me, so I don’t compress too much.
If you’re on WordPress, you can install plugins like ShortPixel or Smush to automatically compress the images. Or use tools like TinyJPG and ImageOptim.
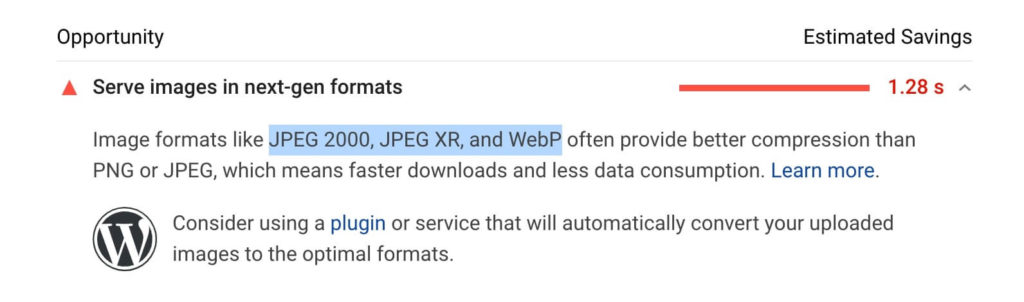
Note: Google Lighthouse and PageSpeed Insights audits recommend next-gen image formats like WebP, JPEG 2000, and JPEG XR, but these are not compatible with all web browsers yet.
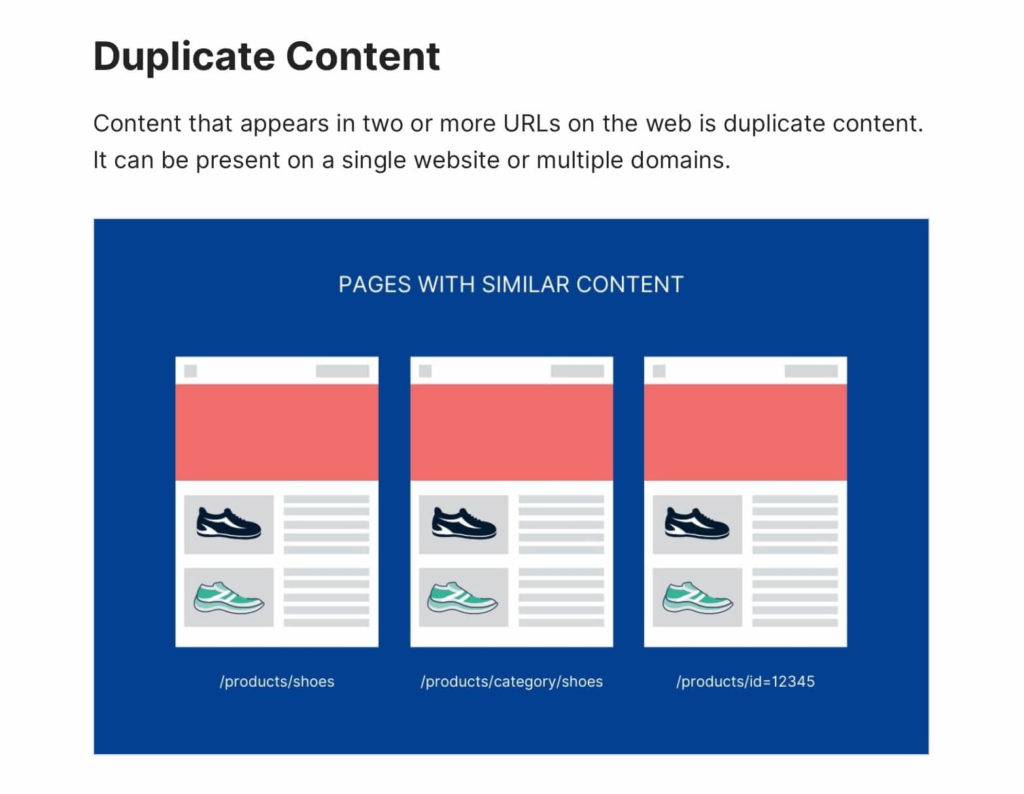
Unique Images
Custom and unique images (like graphics, illustrations, screenshots) help make the content better and engaging for users — which indirectly helps with search rankings.
For example: I create and embed many custom graphics in my SEO handbooks.
These custom graphics aren’t cheap, but they’re super valuable. They not only help with image SEO, but they can also get you a good amount of links as other sites can use your high-quality images and link to you as the source.
So try and avoid generic stock images and use high-quality and unique images on your website.
Descriptive Alt Text
Alt text or alt tags stands for alternative text that describes an image. This tag helps Google better understand the image contents, and it also improves page accessibility by assisting screen-reading tools.
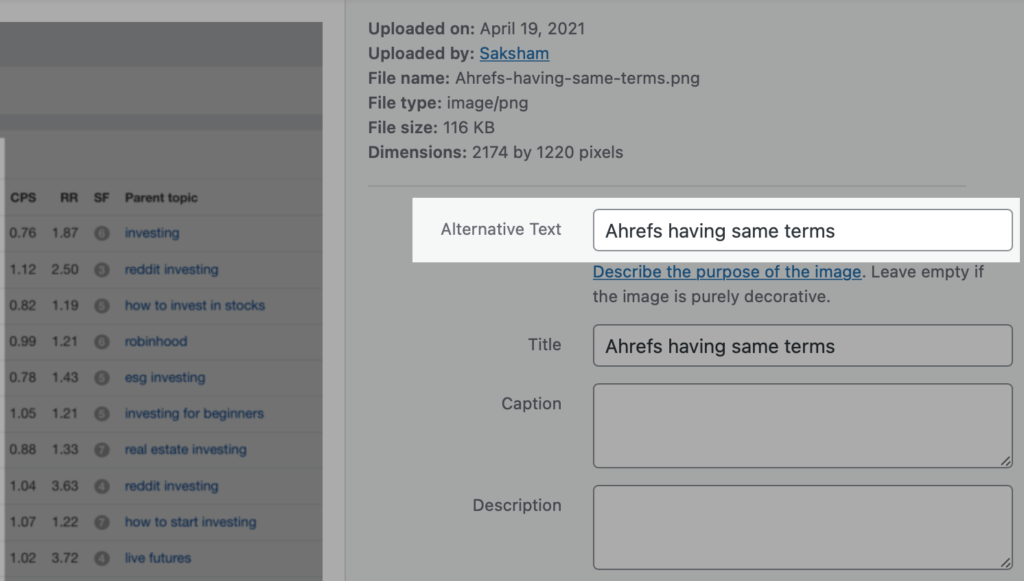
Image alt text syntax example:
<img src=“sample-image.jpg” alt=“This is a sample image” >So write descriptive alt text by explaining the contents of an image while including your primary keyword (and a few variations).
Note that you don’t always have to fit your keywords in alt tags. For best image SEO, alt tags should be unique, relevant, and descriptive.
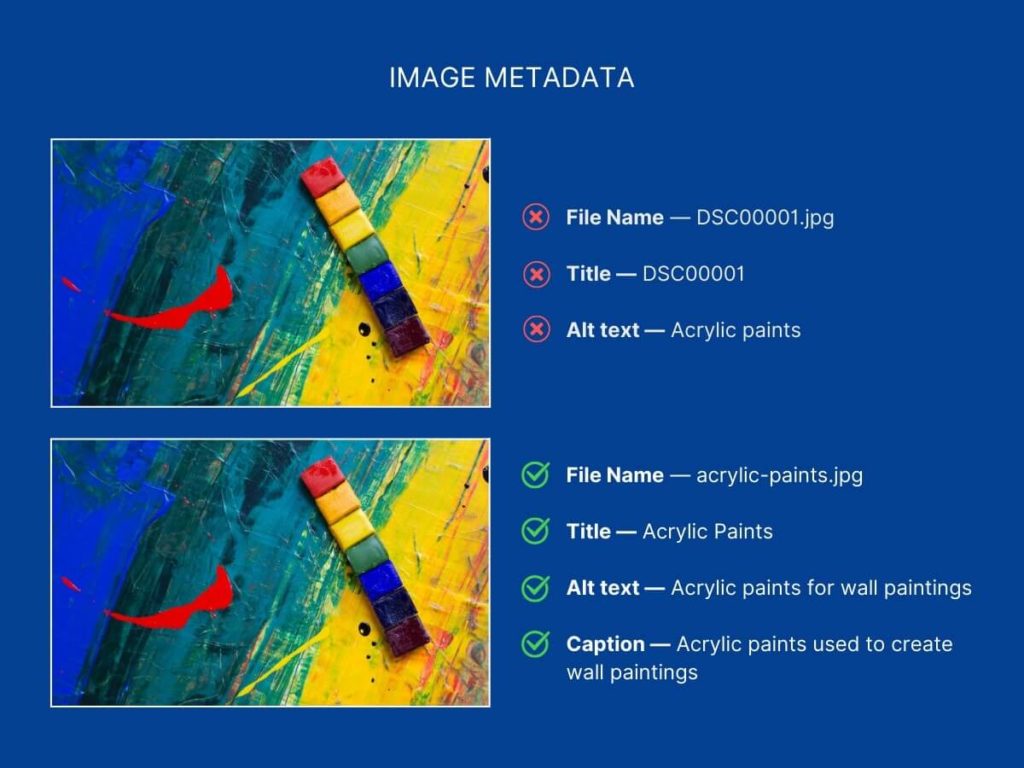
Descriptive Title, File Name & Captions
Google uses the image metadata like the title, file name, and captions to understand the images. Text close to images also adds relevance for search engines.
So like image alt text, write descriptive image captions (small text below images), file names, and title, whenever possible.
For example: image file name “acrylic-paints.jpg“ is better than “DSC00001.JPG”.
Note: If you’re on WordPress, change the image file names before you upload them, as you can’t edit image file names in WordPress once they’re uploaded.
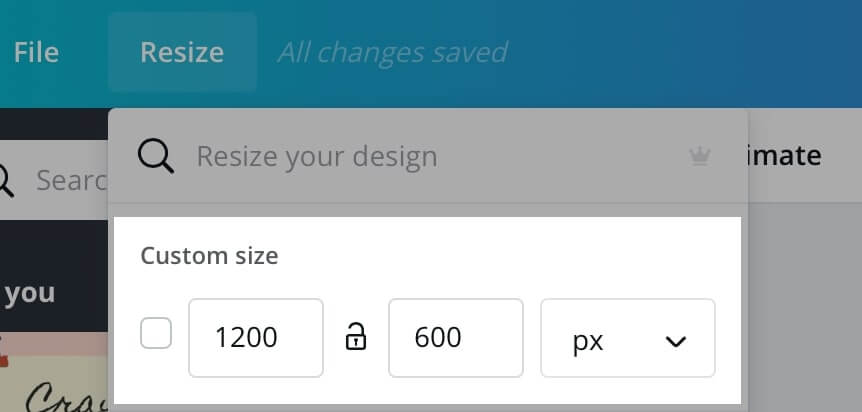
Image Dimensions
Image dimension is the ratio of height to width of an image. Ideally, images should have the same width as your website pages.
So if your website page width is 640px (follow this to find out this number), then keep the width of the maximum image at 640px.
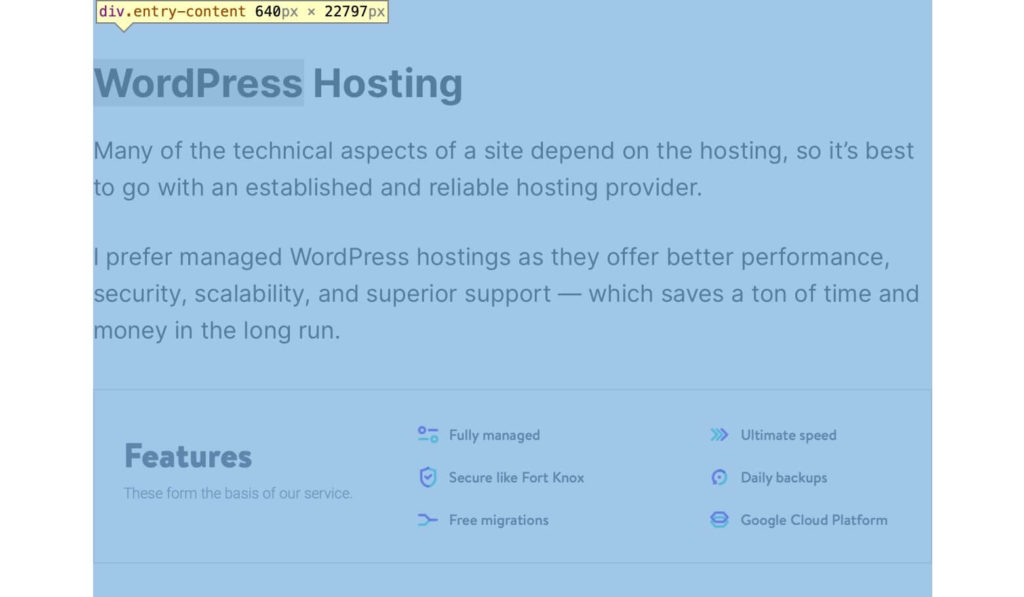
Using an extra large 3000px wide image won’t help as browsers still load the image in 640px width only.
If you’re creating your images in tools like Canva or Adobe Photoshop, you can set the image size before downloading the images or use this free tool to bulk resize images.
Serving images with the correct dimensions will also positively impact your page loading time.
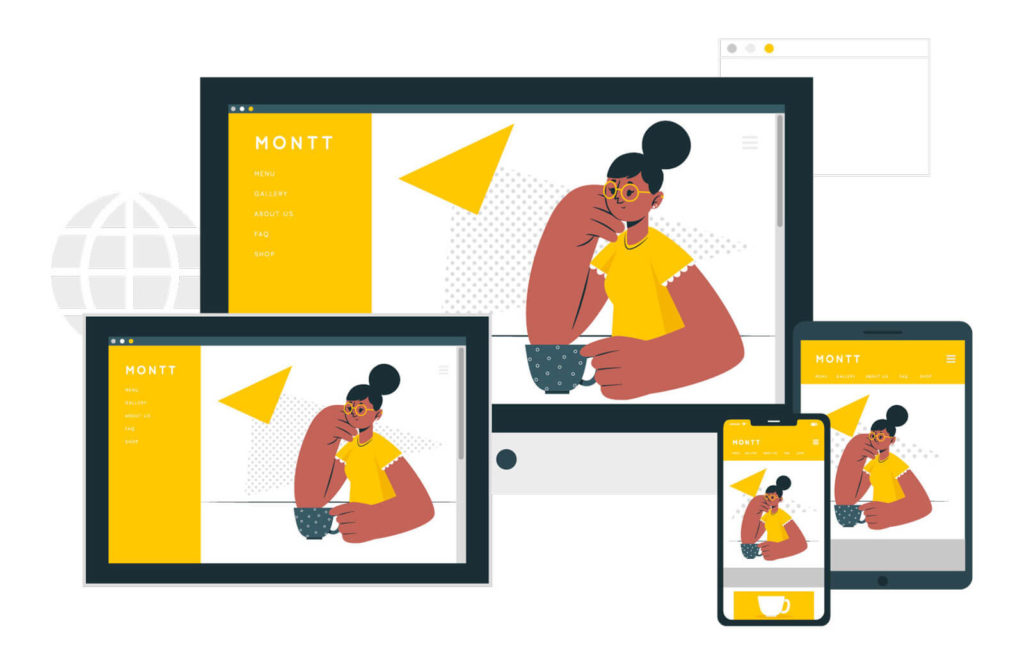
Responsive Images
Now that Google uses mobile-first indexing, all your website content should be responsive and mobile-friendly, including the images.
Responsive images means the image scale automatically based on the user’s screen size.
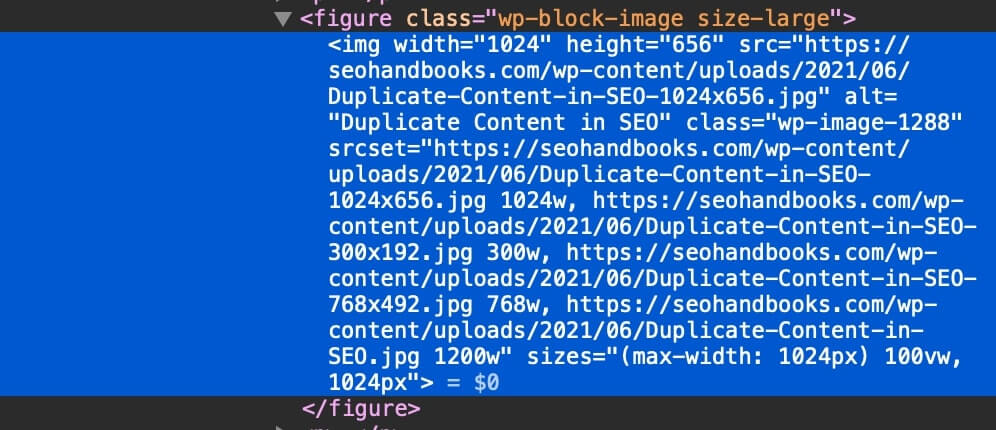
To make your images responsive, you can use the srcset HTML tag.
<img src=“acrylic-paints.jpg” srcset=“acrylic-paints-small.jpg 400px, acrylic-paints-medium.jpg 800px, acrylic-paints-large.jpg 1800px”>If you’re on WordPress (version 4.4 or above), you can simply upload images according to the desktop page width, and WordPress will make the images responsive for smaller screen devices like tablet and mobile.
Vector Graphics
According to Google, “Vector graphics use lines, points, and polygons to represent an image. They are ideally suited for images that consist of simple geometric shapes such as logos, text, or icons. In general, they are an ideal format for high-resolution screens and assets that need to be displayed at varying sizes”.
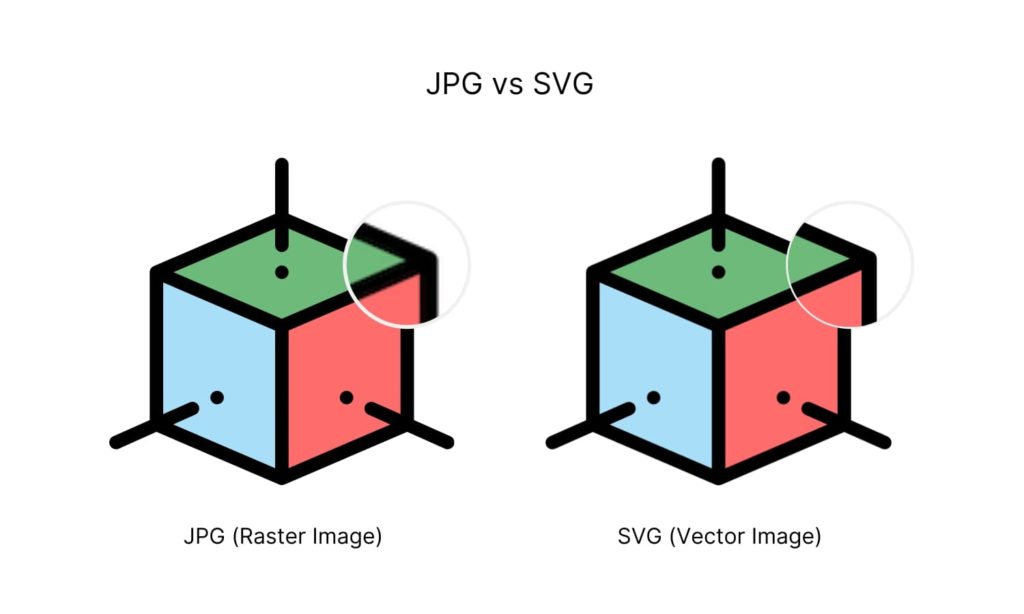
So you can use SVGs (Scalable Vector Graphics) in your content (for logs and other graphics) to keep crystal clear images. SVG images are lighter, faster, and load instantly in browsers.
You can use tools like Adobe Illustrator to create and export vector images or use this tool to convert existing JPG or PNG images to vector format.
Note: Due to some security reasons, WordPress doesn’t support the SVG format. But you can follow this guide by Kinsta to enable SVG support.
Image File Structure
Google’s official guidelines state that Google uses the image URL path and the file name to understand the images.
So instead of using a single folder for all your images (example: /media/), you can use relevant subfolders.
For example: if your site is about laptops, the image URL structure can be yoursite.com/laptops/apple/macbook-pro.jpg
This is particularly recommended for ecommerce stores and multi-category blogs.
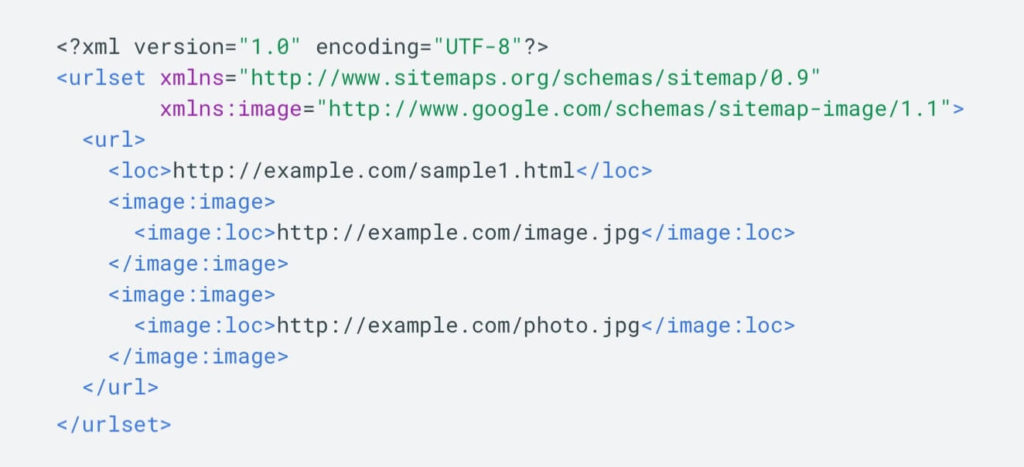
Image Sitemap
Images sitemaps provide additional information to Google about your images which helps with crawling and indexing.
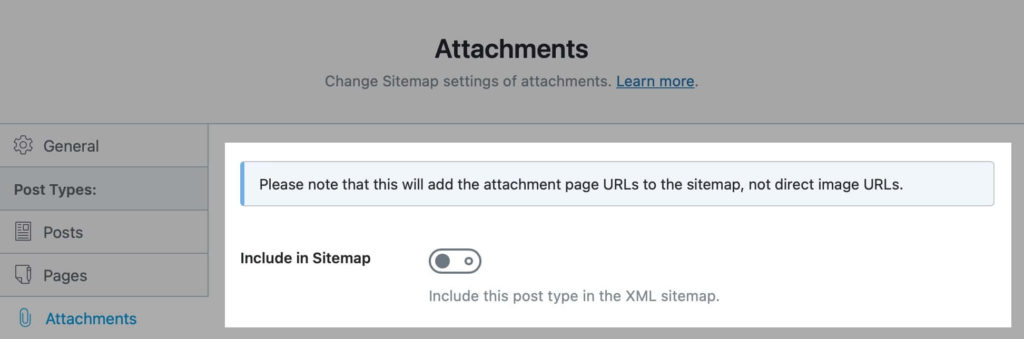
On WordPress, you can use an SEO plugin like Yoast or RankMath as they automatically add images to your sitemap.
Note: If you’re using a CDN to host your images, you can mention the URLs in the image sitemap to ensure Google crawls all your images.
Relevant Context
You can add more context to your images by describing not-so-obvious details like the location where the image is taken or an event that the image is showing.
This helps Google understand how the image is relevant to your page’s topic and how it adds value for users.
While Google is getting better at recognizing the contents of an image, you shouldn’t rely on Google’s capabilities only. So provide as much context possible in the image surrounding text.
Structured Data
You can markup your images with structured data to display them as rich results, increasing your organic CTR and traffic.
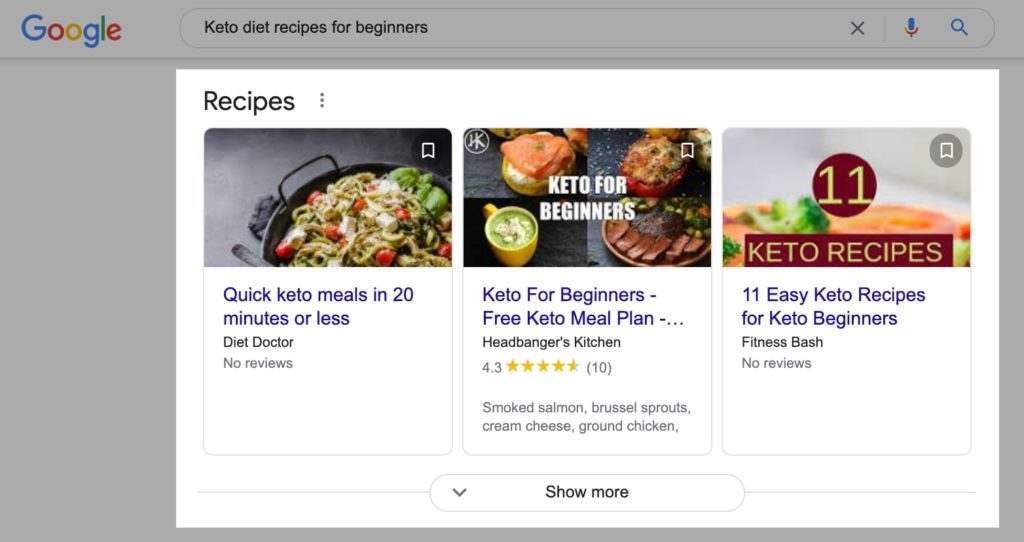
Google Images currently supports four structured data types:
- Recipe for receipe pages
- Video for pages with videos
- Product for product pages
- GIF for GIF image format
To add structured data on WordPress, you can use plugins like Schema or Schema Pro.
Image Lazy Loading
Image lazy loading is a technique that loads the images only after above-the-fold content is fully loaded or when the user scrolls the page, and the image appears in the browser’s viewport.
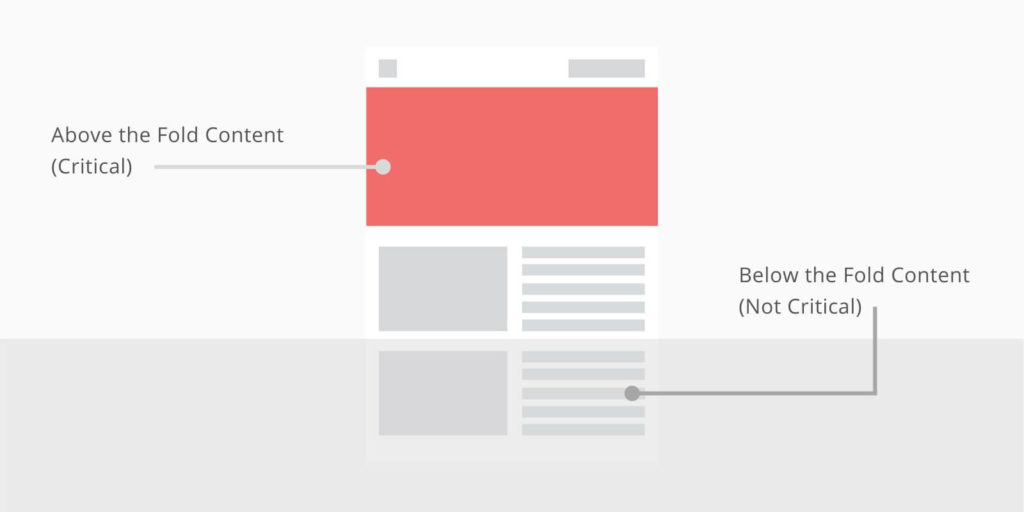
Lazy loading helps lower the initial page load time and saves bandwidth.
As you can see in this guide, I have used over 20 images, and the total page size is over 2 MB, but due to lazy loading, images appear only when you scroll the page — which keeps the overall page load time very high.
In WordPress 5.5, images are lazy loaded by default, so you don’t have to set up anything particular for this.
Leverage Browser Caching
You can leverage browser caching to store the images (and other files) in user’s browsers locally. So when the user revisits your site, the images load faster.
Google also recommends caching static content (like images) to speed up the page load time on repeat visits.
In WordPress, you can simply install caching plugins like WP Rocket or W3 Total Cache to enable browser caching.
Use a CDN
You can serve your images via a CDN (content delivery network) that stores the image files across a global network of servers. So whenever a user visits your site, the image files are loaded from the CDN server closest to them.
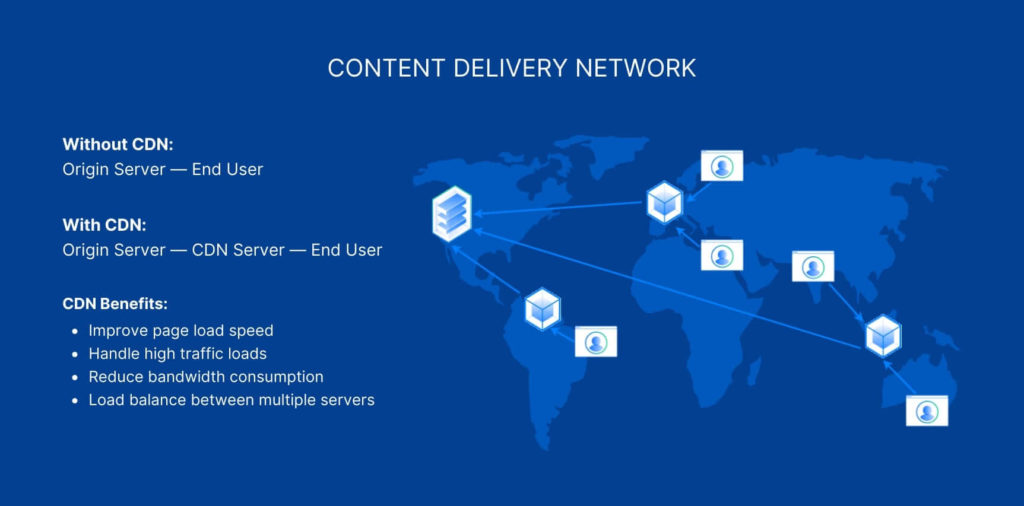
Some of the popular CDN services are:
- KeyCDN
- Bunny.net
- Cloudflare
- StackPath
If you’re using a caching plugin on your WordPress site, you can configure the CDN in a few simple steps (follow the plugin docs for the steps).
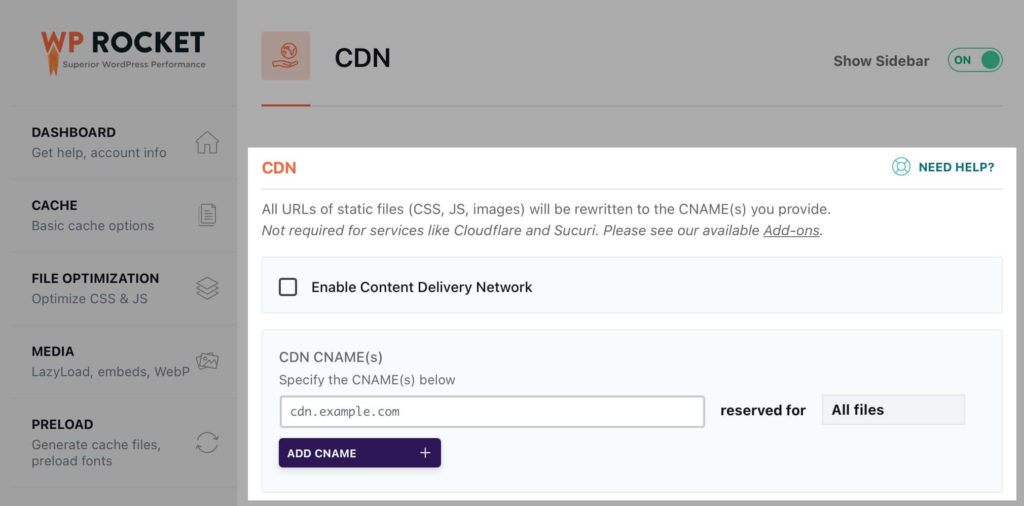
Note: When a CDN is implemented, all the files get stored on the CDN servers, so the URLs also get changed to the CDN provider’s subdomains.
So it’s recommended to use a CNAME record and change the CDN URL to cdn.yoursite.com. Follow this guide for the steps.
Optimize for SafeSearch
SafeSearch is a setting in Google user accounts that specifies whether to show or block explicit content like images in Google search results.
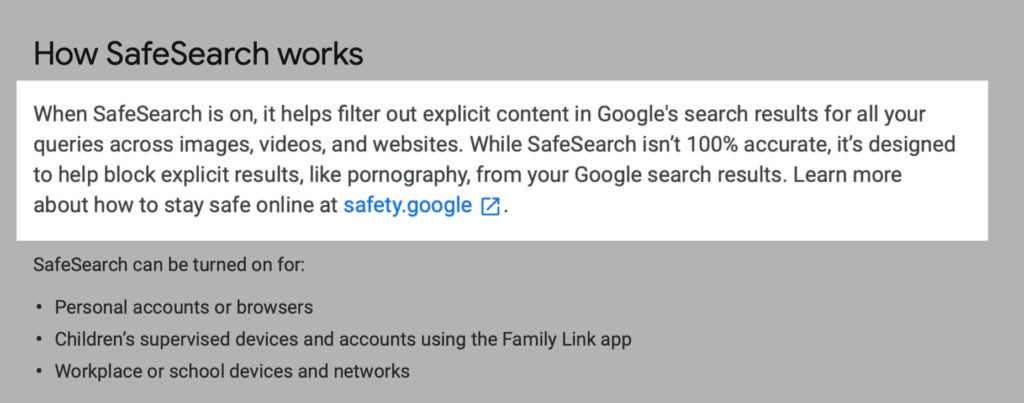
Many users (especially kids) use SafeSearch to avoid adult content in Google, so it’s a good idea to mark images accordingly.
For example: if your site has adult-only images, you can group them separately from other images.
yoursite.com/adult/first-image.jpg
yoursite.com/adult/second-image.jpg
You can also mark the images with the following meta tags to help Google recognize the adult content.
<meta name=“rating” content=“adult” />
<meta name=“rating” content=“RTA-5042-1996-1400-1577-RTA” />
Putting It All Together
Here’s a quick recap of what we have discussed so far to help you optimize your site for image SEO…
- Right Image Format — Describes how data related to the image will be stored.
- Image Compression — Process to reduce the size of images.
- Unique Images — Custom graphics that help make the content better and engaging for users.
- Descriptive Alt Text — Alternative text that describes the contents of an image.
- Descriptive Title, File Name & Captions — Metadata information stored in an image file.
- Image Dimensions — Ratio of height to width of an image.
- Responsive Images — Images optimized for all screen sizes — desktop, tablet, and mobile.
- Vector Graphics — Lighter, faster, and scalable graphics.
- Image File Structure — Defines how images are organized in the website.
- Image Sitemap — A list of all the image URLs used in a website.
- Relevant Context — Text surrounding the image adds context to what the image is about.
- Structured Data — Mark up data to help Google understand image contents.
- Image Lazy Loading — Defers the image loading until the image is visible in the browsers’ viewport.
- Leverage Browser Caching — Stores images (and other files) in visitors’ browsers.
- Use a CDN — Content delivery network of servers to minimize web page loading time.
- Optimize for SafeSearch — Helps Google identify the image content type.
You can also download my free 74+ point technical SEO audit checklist (in Notion and Google Sheets ) to perform a complete technical SEO health check on your website.
This checklist contains all the critical technical SEO elements such as image optimization, crawlability, indexation, site structure, performance, and accessibility.
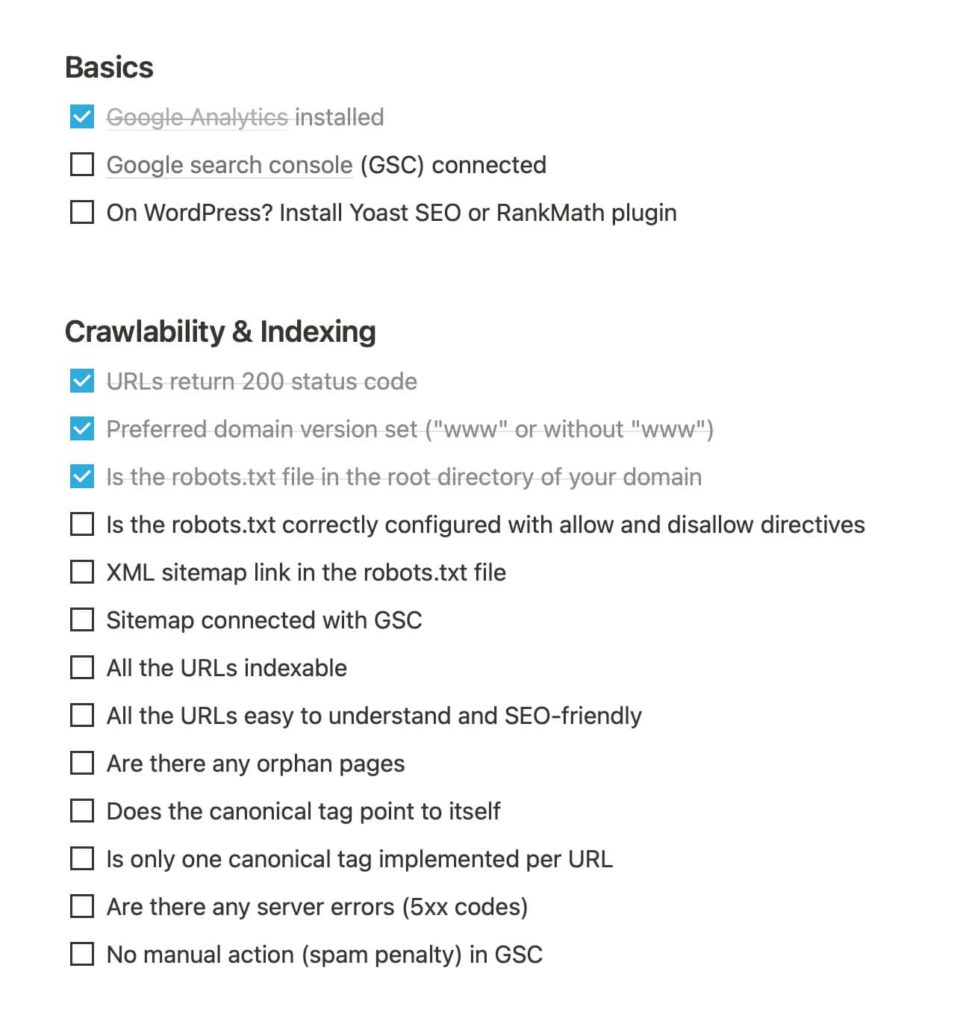
So download this checklist now and use it as a step-by-step list of items to make sure you don’t miss anything.
Download Checklist in: Notion and Google Sheets.
Final Words…
Image SEO can be tricky to master, as there are many moving parts and complex science behind image optimization. And that is why most SEOs and site owners miss it.
But if you do it right, it will definitely pay off in the long run, as Google Images can drive a significant amount of traffic.
Plus, you’ll get backlinks, social media shares, and higher user engagement if you optimize the images properly.
Once you’re done with image SEO, read my handbook on Technical SEO to make sure your site is best optimized for organic traffic.
——
Thanks for reading. I hope you find this useful.
If you liked this handbook and want to learn more on SEO-related topics, joining my newsletter is really appreciated, or share it with your friends on social media.
